
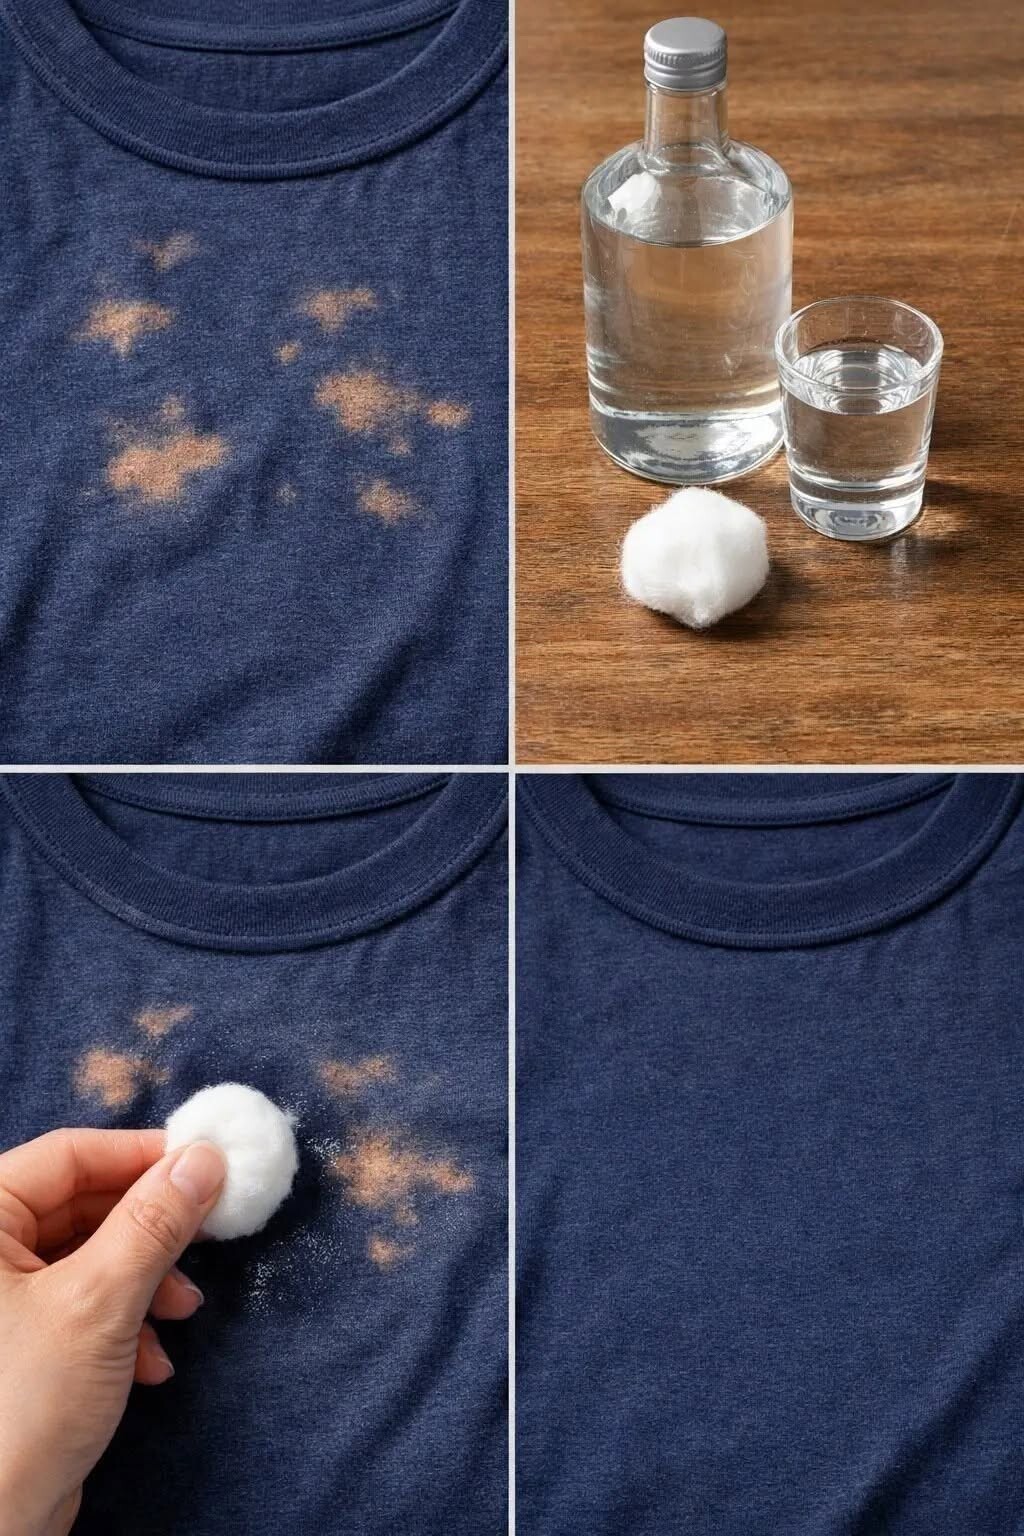
Accidentally getting bleach on your favorite shirt or pair of pants feels like an absolute laundry disaster. One small splash can leave behind frustrating orange, yellow, or white discolored spots that seem to instantly ruin a perfectly good item. Most people assume that once liquid bleach contacts colored fabric, the garment is beyond repair and belongs in the trash.
However, before you toss out your favorite clothes, there are several clever techniques—ranging from rubbing alcohol transfer methods to re-dyeing solutions—that can neutralize, mask, or entirely fix bleach spots. In this ultimate guide, we will break down the science of bleach stains, walk through step-by-step restoration methods, and share practical laundry safety tips to save your wardrobe and your money.
Understanding Bleach Stains: What Actually Happens to Your Clothes?
To fix a bleach stain, it helps to understand what bleach actually does to fabric. Unlike standard stains caused by coffee, wine, or grease, bleach does not leave behind a foreign substance or pigment layer.
Bleach Discoloration vs. Actual Staining
Chlorine bleach is a powerful oxidizing agent. When it touches dyed fabric, it strips away the color molecules (chromophores) embedded in the textile fibers. This means a bleach stain is not actually a “stain” at all—it is a permanent loss of pigment.
Because the original color has been stripped, standard stain removers or heavy-duty laundry detergents will not work. Restoring the garment requires either transferring surrounding dye back into the bleached area, neutralising lingering chemicals, or applying new color matching the original shade.
Method 1: The Rubbing Alcohol Dye-Transfer Trick
For minor bleach spots on dark fabrics (like black, navy blue, or dark grey), the rubbing alcohol method is one of the quickest, most effective hacks. Rubbing alcohol breaks down the surrounding dye on unaffected areas, allowing you to drag excess color over the bleached spot.
Supplies Needed
- Clear Rubbing Alcohol (Isopropyl alcohol, 70% or higher)
- 1 Clean Cotton Ball or Swab
- 1 Clean Towel (placed underneath the fabric)
Step-by-Step Instructions for the Rubbing Alcohol Method
Follow these sequential steps carefully to lift surrounding dye into small bleached spots.
+-------------------------------------------------------------------+
|                        BEST USE CASE                              |
| This method works exceptionally well on SMALL spots on dark,     |
| natural-fiber clothing like cotton t-shirts, hoodies, and jeans!  |
+-------------------------------------------------------------------+
Step 1: Lay the Garment Flat
Place a clean, dry towel inside the shirt or under the affected garment area. This prevents alcohol or excess dye from bleeding through to the back side of the fabric.
Step 2: Saturate the Cotton Ball
Dampen a clean cotton ball or cotton swab with clear rubbing alcohol. You want it moist, but not dripping excessively.
Step 3: Rub Around the Bleached Edge First
Gently swab the dark, unaffected fabric immediately surrounding the bleach spot. The rubbing alcohol will loosen a small amount of the original dye from the undamaged fibers.
Step 4: Work inward toward the Center
Using gentle circular motions, drag the cotton ball from the dark surrounding edges toward the center of the bleached spot. As the alcohol transfers the loosened pigment, the bleached white or orange area will gradually take on the original color.
Step 5: Let It Dry and Rinse
Allow the fabric to dry completely to verify the color match. Rinse the garment with cool water and wash it on a gentle cycle to set the transferred dye.
Alternative Ways to Fix Severe Bleach Damage
If bleach spots cover a large area or the fabric is too light for the alcohol transfer method, consider these reliable alternative restoration options:
| Restoration Method | Ideal Fabric Type | Primary Tools | Success Rate |
| Rubbing Alcohol Transfer | Dark cotton, navy/black garments | Isopropyl alcohol, cotton ball | High for small spots |
| Fabric Markers / Pens | Medium to dark solid colors | Permanent fabric markers | Medium to High |
| Fabric Re-Dyeing | 100% natural fibers (cotton, linen) | Fabric dye (Rit, Dylon), bucket | Very High for full items |
| Sodium Thiosulfate Neutralizing | Fresh bleach spills | White vinegar or thiosulfate | Prevents fiber holes |
| Creative Patching & Distressing | Denim jeans, casual jackets | Embroidered patches, fabric paint | High (stylish fix) |
1. Fabric Markers and Permanent Ink
For medium shades or intricate patterns, purchasing a permanent fabric marker matching the shade of your garment provides an immediate fix. Color over the bleached area in light, feathered strokes, allowing the ink to dry completely between layers.
2. Full Garment Re-Dyeing
When a garment suffers extensive bleaching, re-dyeing the entire item using fabric dye (such as Rit or Dylon) is often the best solution.
- Important Note: If you are dyeing synthetic fabrics like polyester, ensure you purchase specialized synthetic dye formulations, as standard cotton dyes will not adhere.
3. Neutralize Fresh Bleach Spills Immediately
If you accidentally spill bleach on a shirt right now, stop the chemical reaction instantly! Flush the area with cold running water, then soak it in a mixture of 1 tablespoon white vinegar to 2 cups of cold water. Vinegar neutralizes the chlorine bleach, preventing it from burning physical holes through the fabric fibers.
Practical Laundry Habits to Prevent Bleach Accidents
Prevention is always easier than restoration. Incorporate these proactive habits into your household laundry routine:
- Switch to Color-Safe Bleach: Non-chlorine oxygen bleaches brighten colors without stripping dyes or causing accidental white spots.
- Add Bleach Before Clothes: If using traditional liquid chlorine bleach, always add it to the washing machine dispenser or water before loading garments.
- Wear Household Protection: When cleaning bathrooms or kitchens with bleach sprays, wear dedicated cleaning clothes or aprons to protect your daily wardrobe.
- Store Chemicals Safely: Store bleach bottles on low, secure shelves away from laundry baskets to avoid accidental drips or leaks.
Financial and Smart Home Considerations
Taking the time to repair damaged clothing rather than replacing it reflects smart household budgeting and sustainable living habits:
- Financial Savings: Repairing a $50 shirt or $80 pair of jeans with a $2 bottle of rubbing alcohol keeps discretionary cash in your pocket. These compounding household savings can be channeled into long-term goals like a retirement plan, investment portfolio, or education fund.
- Consumer Protection & Insurance: Maintaining high-value wardrobes and home textiles supports general property upkeep, aligning with smart consumer habits that keep overall household insurance and personal asset inventories organized.
- Sustainable Living: Extending the lifespan of textiles reduces landfill waste and minimizes environmental impact, making home restoration hacks both economically and ecologically sound.
Fascinating Facts About Bleach and Textiles
- Ancient Bleaching Methods: Before chemical chlorine bleach was invented in the late 18th century, people bleached cloth by soaking it in sour milk and exposing it to sunlight for weeks in fields known as “bleachfields.”
- Denim Distressing: The iconic “bleached” or acid-washed jean look was popularized in the 1980s using pumice stones soaked in chlorine bleach to intentionally strip pigment in stylized patterns.
- Bleach and Fiber Strength: Chlorine bleach weakens natural fibers like wool and silk significantly, which is why chemical labels strictly advise against using bleach on delicate animal proteins.
Conclusion
A bleach spot doesn’t have to mean the end of your favorite shirt or pants. By using simple techniques like the rubbing alcohol transfer trick, permanent fabric markers, or full garment re-dyeing, you can easily save discolored clothes and restore their appearance. Try these easy household hacks today before tossing out your laundry!
Frequently Asked Questions (FAQ)
Does rubbing alcohol work on all fabric colors?
The rubbing alcohol dye transfer method works best on dark, solid colors like navy, black, dark brown, and charcoal gray. It is less effective on light pastels or white fabrics because there isn’t enough surrounding pigment to transfer into the bleached spot.
Can vinegar fix a bleach stain after it has dried?
Vinegar cannot restore color to a bleached spot that has already turned white or yellow. However, applying diluted vinegar immediately after an accidental spill neutralizes active bleach, stopping chemical fiber damage before holes form.
Why do bleach stains turn yellow on white clothes?
When bleach is used improperly or in high concentrations on white garments, it strips away optical brighteners added during manufacturing, exposing the natural yellow undertone of the raw cotton fibers underneath.
Is it safe to mix bleach with vinegar to clean clothes?
No, never mix bleach and vinegar! Combining chlorine bleach with any acid (including vinegar) releases toxic chlorine gas, which causes severe respiratory irritation and health hazards. Always rinse bleach out thoroughly before applying vinegar.
What if rubbing alcohol didn’t transfer enough color?
If rubbing alcohol doesn’t move enough dye, let the garment dry and try using a fabric marker or fabric dye pen perfectly matched to your shirt’s shade.